Users
User registration is the first step to start using Cash Management in Prophix One. This process allows you to add new users and control what parts of the system they can access.
Access the Users page
Navigate to  Registration Settings > Users.
Add a user
-
Access the Users page.
-
Click
 .
. -
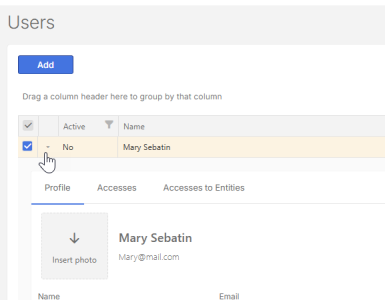
Fill in the user’s Profile:
- Insert photo: Add a profile photo (optional).
Supported image formats: PNG, JPG, JPEG.
Maximum file size: 3 MB.
-
Name: Enter the user’s name.
-
Email: Enter the user’s email (required).
-
Function: Choose a position from the available list (required).
- Insert photo: Add a profile photo (optional).
-
For the following options, select as applicable to the user:
-
Active – Select this option to activate the user account. If not, the user remains inactive and cannot log in.
-
Administrator – Select this option to grant the user full administrative rights. Administrators can configure system settings and manage other users.
-
Access to Hub – Select this option to allow the user to sign in to the Hub.
-
-
In the Notifications section, choose the alerts user should receive.
-
In the Data display section, choose how data should be displayed in the application to the user.
-
In the Period view section, choose the time-frame of the financial data that should be available to the user:
-
Last date range: The most recent period for which data has been loaded into the system.
-
Current position: The current specific period (such as a month or week).
-
-
In the Select language section, choose the application language for the user. Default is Browser language.
-
Click
 .
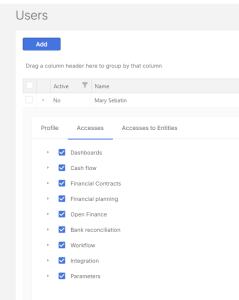
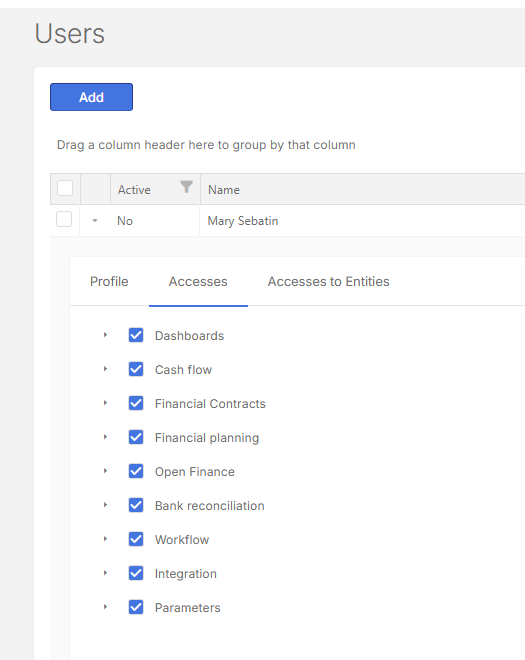
. Note: If the user is not an Administrator, two additional tabs appear to the right of the Profile tab: Accesses and Accesses to Entities. In this case, the user’s access within the application must be specified.
Set user access permissions
If the user is not an administrator, you must specify the user’s access within the application, using these two tabs:
-
Accesses: Choose which areas (like Cash Flow or Contracts) the user can access.
-
Accesses to Entities: Choose which entities or organizations the user can access.
Note: By default, Administrators can access everything.
Grant user access to menus
-
After adding the user’s profile, go to the User list and click the user’s name to display the Profile.
-
Click the Accesses tab and select the menus applicable to the user’s function.
-
Click
.

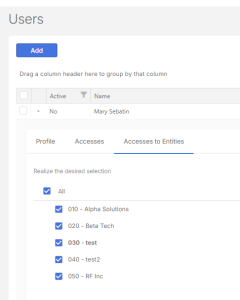
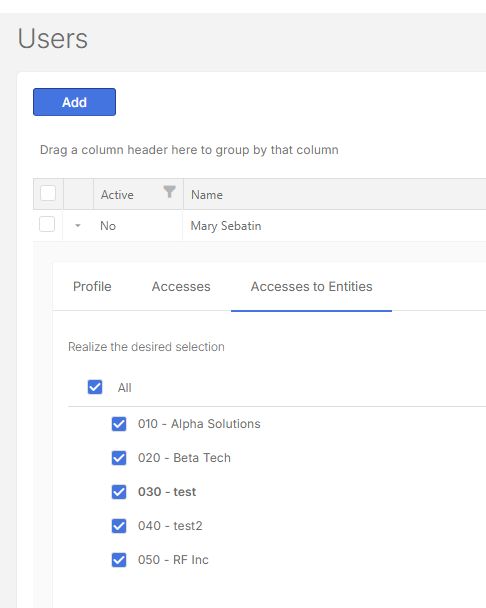
Grant user access to entities
To grant the non-Administrator user access to selected entities:
-
Click the Access to Entities tab (next to the Accesses tab).
-
Select the entities to which the user will have access.
-
Click
.
What happens after registration
After you finish the setup:
-
The user will get a confirmation email.
-
They must create a password to activate their account.
-
After that, access to Cash Management is granted
Group users by column header
Users can be grouped by the column headers on the Users page.
-
On the Userspage, drag a column header.
-
Drop it in the space above the column header, adjacent to the Search field. For example, to group by start date, drag the Start column header to the space above. See Group data by column headers for more information.
Note: To restore the default setting, refresh or reload your browser.
Where user settings apply
| Setting | Location |
|---|---|
| Name, photo, and position | My Preferences, Users, Logs, and Processes |
| Notifications and dashboards | Cash flow alerts and dashboard emails |
| Language | System-wide language settings |
| Access to menus and entities |
Cash flow, contracts, and financial planning, |