Workflow management
Workflow Management enables all team members (especially financial managers) to define recurring activities (tasks), structure workflows, and assign deadlines. This ensures effective monitoring and execution of activities within their respective departments.
Access the Workflow management page
Navigate to  Registration Settings > Workflow management.
Create a workflow structure
Before tasks can be added, you must create the workflow structure. This establishes the hierarchy and defines how activities will repeat over time.
-
Access the Workflow management page.
-
Click
 .
. -
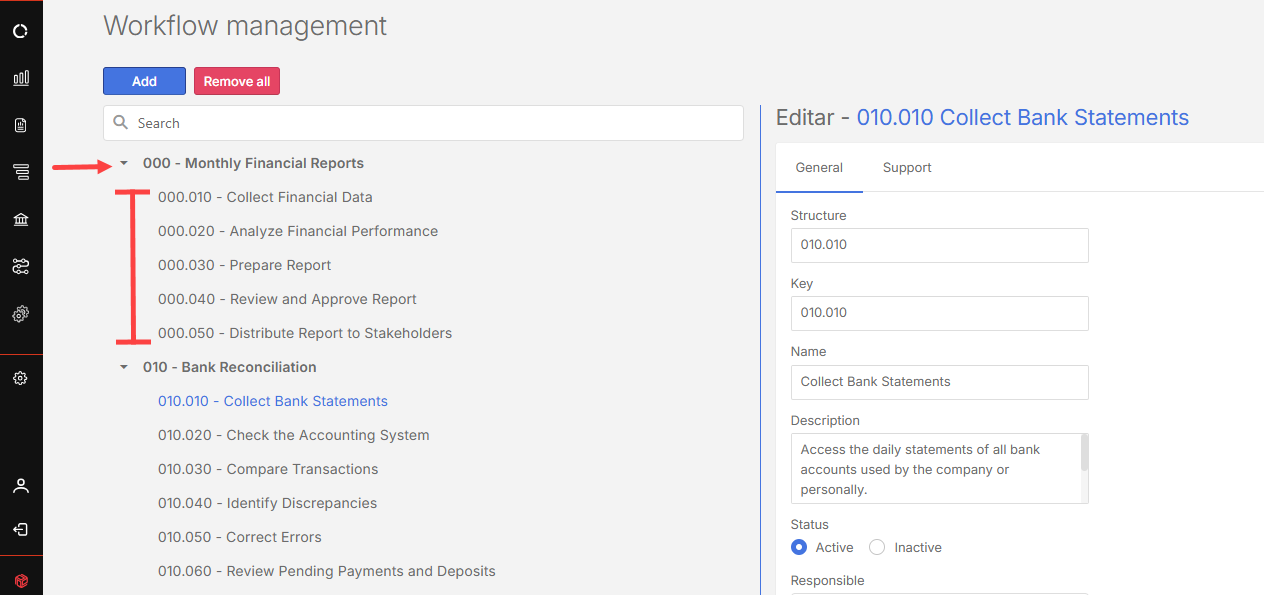
In the General tab, define the structure by entering:
-
Structure: A hierarchical identifier (system-populated by default). You may enter another number as desired.
-
Key : A unique identifier for the workflow.
-
Name : The name of the workflow.
-
Status: Active or Inactive.
-
Responsible: User responsible for the workflow.
-
Frequency: How often the workflow occurs. Select an option.

-
-
Click
 .
. Once saved, the structure becomes available for task creation

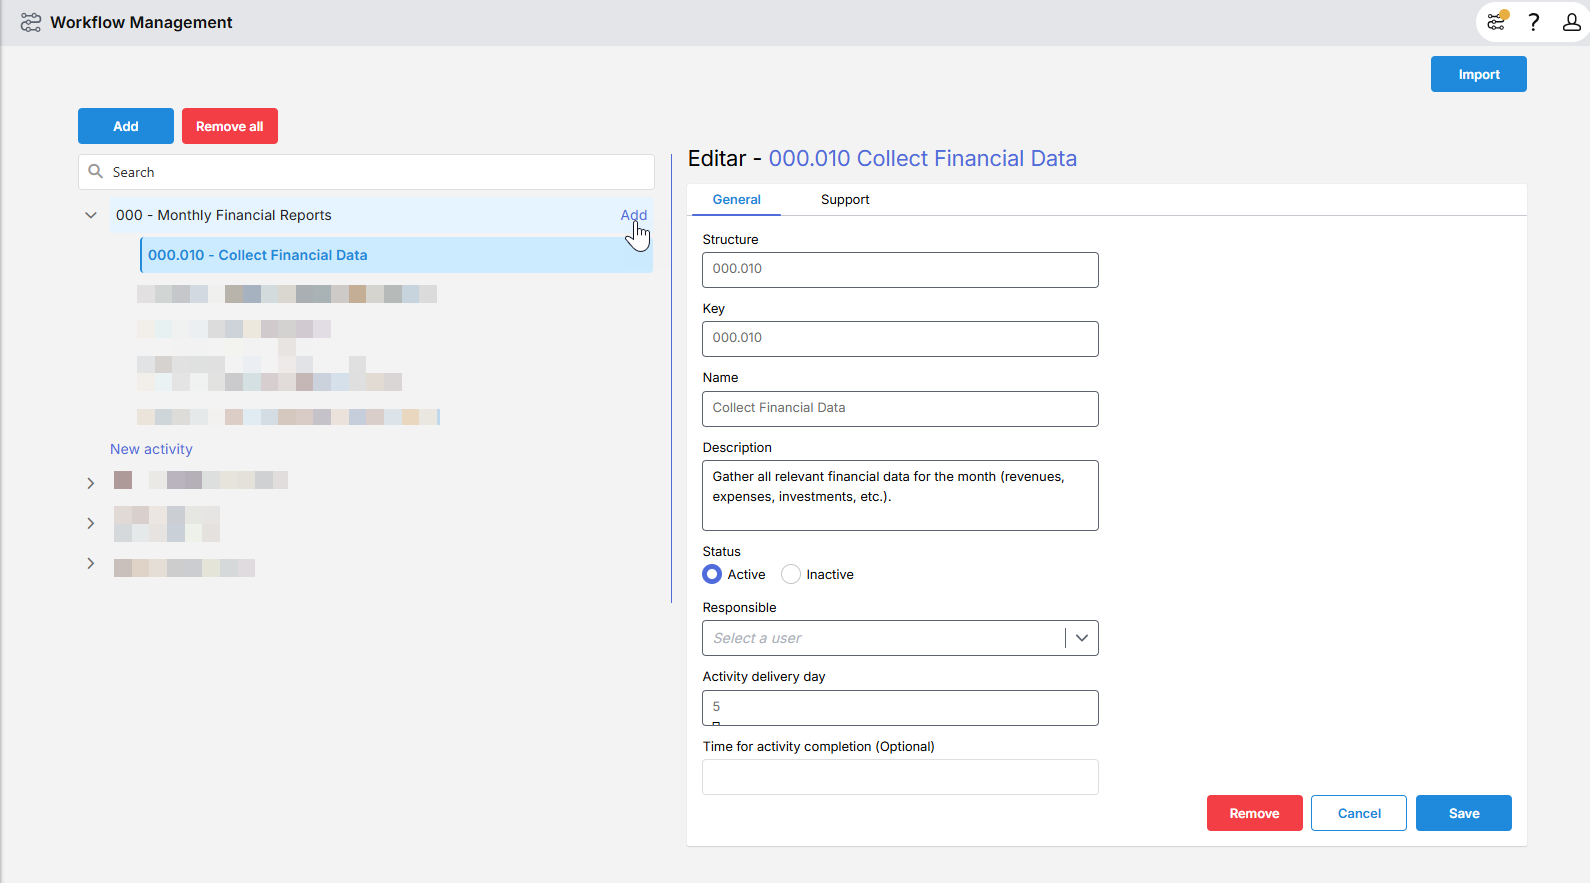
Add activities or tasks to the workflow
Tasks represent the individual actions that must be completed within each workflow.
-
On the Workflow management page, hover over the workflow structure name.
-
Click Add (appears to the right of the structure name).
-
Complete the activity (task) fields.
-
Optionally, enter a start date.

-
Click
.
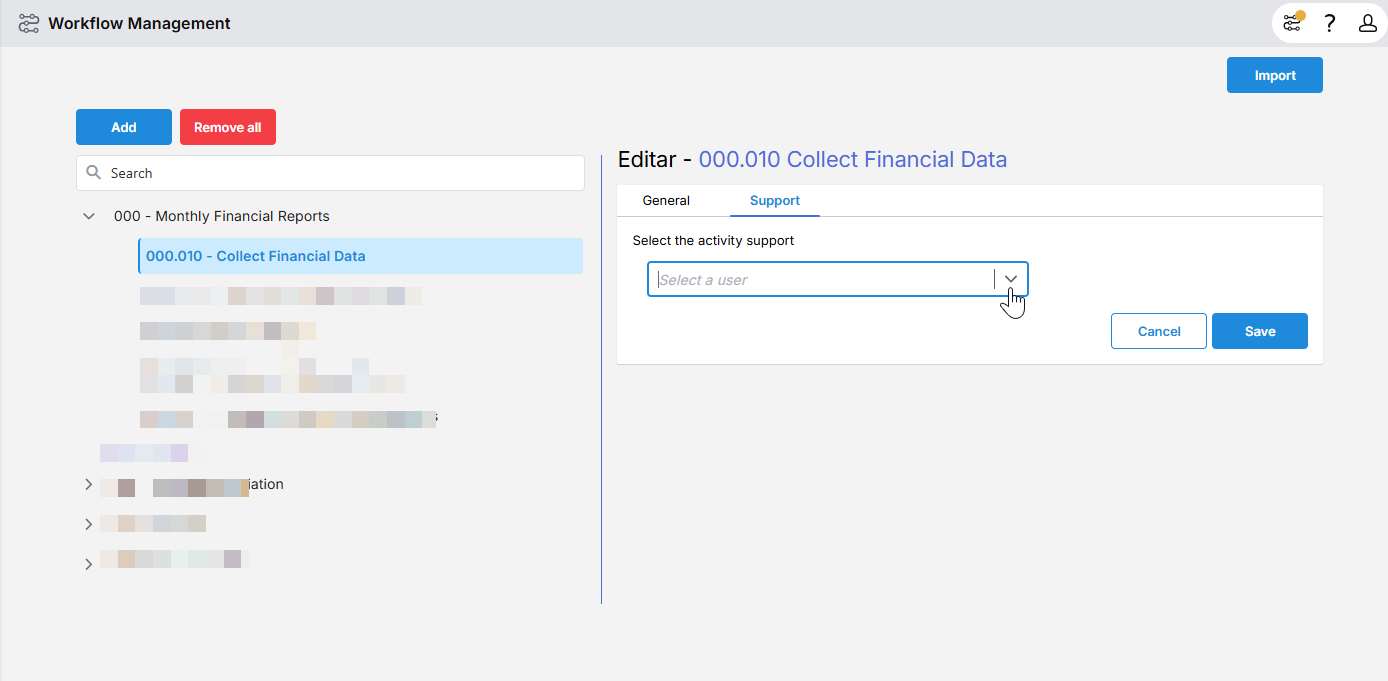
Add a support user to a task
After adding an activity or a task to a workflow, the Support tab is enabled. You may assign a support user, but the structure’s responsible user cannot also be the task owner or support.
-
On the Workflow management page, go to the task or activity to which you want to add a support user
-
Click on it.
-
Go to the Support tab and select a support user.

-
Click
.
Import workflows and tasks
Use the Imports feature to set up workflows and tasks in bulk.
First, export and edit the template.
-
On the Workflow management page, click
 .
. -
Download the XLSX template.
-
Fill in the required fields directly in the spreadsheet.
Next, import the completed file
-
Return to the Imports page.
-
Upload the completed template to quickly create workflow structures and activities (tasks).