Financial flows
Financial flows (classifications) form the structure of the cash flow chart of accounts. Along with treasury accounts, they help analyze and manage the company's financial health.
These parameters organize and structure the cash flow data, making it possible to visualize information in dashboards, projections, financial contracts, and financial planning.
They allow for:
-
Defining different levels of analysis and detail
-
Creating formulas to calculate values between accounts
-
Using the chart of accounts to analyze financial documents (e.g., accounts payable and receivable)
-
Making projections and monitoring entries
Note: Importing values into financial classifications is usually done via integrations or file imports.
Access Financial flows page
Navigate to:  Cash Flow Settings > Financial Flows.
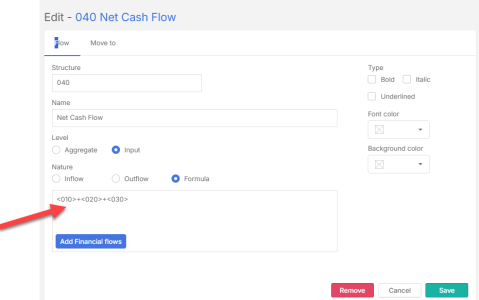
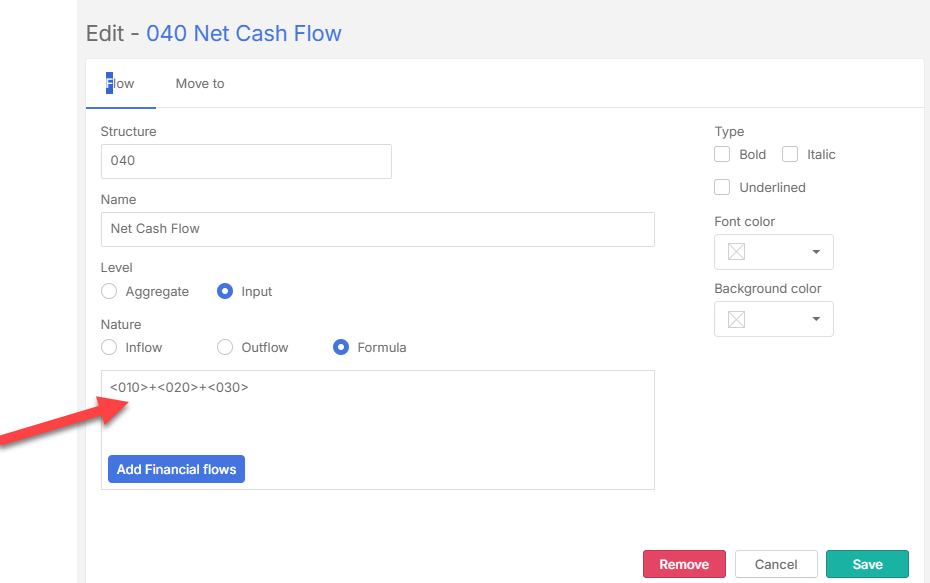
Add a financial flow
To add a new financial flow, start by creating the top-level line of the structure.
Complete the fields:
-
Structure: A sequence of letters, numbers, and dots that defines the structure hierarchy.
-
Name: The name used to identify the financial classification.
-
Optionally, use the Type, Font Color and Background options to customize the appearance of the flow on the list after you save it. See Additional options for classifications.
-
Level: Choose between:
-
Aggregate (synthetic): Higher-level structure.
-
Input (analytical) : Detailed level with advanced configuration options,
-
-
Nature: Defines the flow type:
-
Inflow : Incoming funds
-
Outflow : Outgoing funds
-
Formula: applicable to the Input Level only . This allows you to create calculated lines based on values from other classifications. The results of these formulas are displayed directly in the cash flow view.
-
Enter the formula in the text box
-
Click
 and choose a flow to create calculated lines.
-
-
-
After you have entered all the required fields, click
 .
.
Add sub-level financial flow
Sub-level financial flows can be added to first-level aggregate structures.
-
On the Financial Flows page, hover over an existing flow. If it is a first-level structure Add appears to the right of the name.
-
Click Add next to the name to create a sub-level.
-
Fill in the same fields as adding a new financial flow above. The hierarchy is maintained through the Structure field format.
-
After you have entered all the required fields, click
.
Additional options for creating financial flows
When you create flows, more formatting options are available. These formatting features make it easier to distinguish and interpret key financial lines.
-
Formula Nature: At the Input -Level, in addition to selecting Inflow or Outflow you can also choose Formula. This allows you to create calculated lines based on values from other classifications. The results of these formulas are displayed directly in the cash flow view.
-
Formatting Options: You can customize the appearance of the line to highlight it in the cash flow:
-
Apply Bold, Italic, or Underline
-
Set a font color
-
Define a background color
-
Map financial flows to ERP accounts
Using the External mapping tab, you can link your ERP accounts to your Input-Level financial flows or classifications.
-
On the Financial flows table, choose the account you want to map to your ERP account.
-
Click the External mapping tab.
-
Click
 .
. -
Enter a unique Key and Name to create a FROM-TO relationship between ERP and Cash Management.
-
Click
.
Move financial accounts
Using the Move to tab, you can reposition Input-Level accounts within the financial flow structure.
-
On the Financial flows table, choose the account you want to move to another flow structure.
-
Click the Move to tab.
-
From the drop-down list, select a select a financial flow into which the account will be moved.
-
Click
.
Import financial flows
Note: Internal and external financial flow files must be prepared and imported separately. Each template includes step-by-step instructions and examples.
Import internal financial flows
Users can export an editable XLSX template, input information directly into the spreadsheet, and re-import it back into the system.
To import an internal cost center file:
-
Click
 . The Financial flows import page appears.
 -
Choose this import option: Financial flows, the application parameter .
-
Click in the Download panel to download the file..
-
Fill in the required data in the spreadsheet.
-
Return to the same page and click in the Import panel.
-
Navigate to the completed template on your computer.
-
Click
 to upload the completed file .
Import external financial flows
-
Click
. The Financial flows import page appears. -
Choose this import option: External mapping, the connection with my ERP .
-
Click in the Download panel to download the file..
-
Fill in the required data in the spreadsheet.
-
Return to the same page and click in the Import panel.
-
Navigate to the completed template on your computer.
-
Click
to upload the completed file .
Delete financial flows
Note: You can delete a financial flow only if it is not linked to any integrated documents
Delete a financial flow
-
Go to the Financial flows table.
-
Find and select the flow you want to delete.
-
Click
 .
. -
Confirm your action.
Delete an external financial flow
-
Click the External Mapping tab.
-
Find and select the financial flow you want to delete.
-
Click
. -
Confirm your action.
Using financial flows
Financial flows are used:
-
Cash Flow Settings > Entities.
-
Options Settings > Special functions.
-
Registrations Settings > Users.
-
Options Settings > System Settings.
-
Dashboards.
-
Cash Flow.
-
Contracts.
-
Financial planning.
-
Integrations > Documents.