Projection calendar
The Projection Calendar functionality allows you to manually create projections of inputs and outputs in the Cash Management system, helping to build the cash flow without needing to post these values in the ERP or another system.
This tool is ideal for simulations, estimates, and financial planning directly in the Cash Management system.
Access the Projection calendar page
-
Navigate to
 Cash flow > Projection Calendar.
Overview of the Projection calendar page
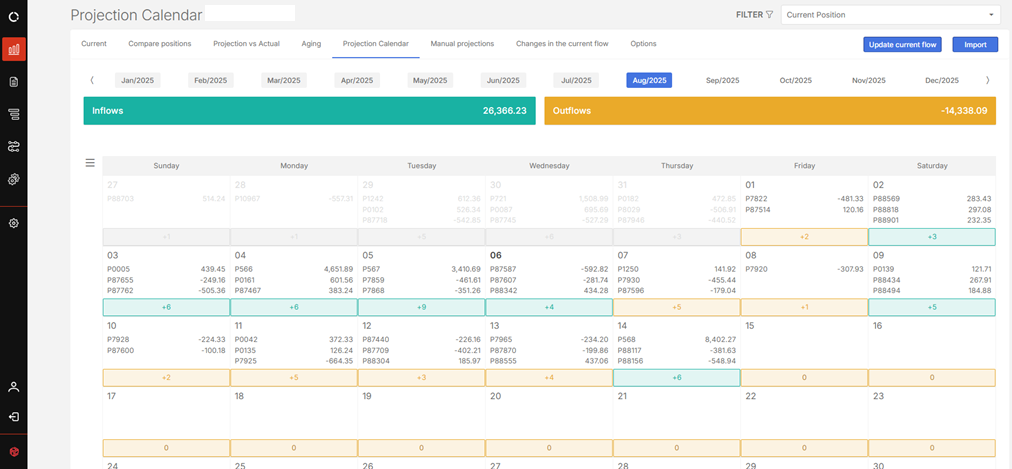
The page displays all 12 months of the current year, showing:
-
Total income and expenses for the selected month
-
A monthly calendar that:
-
Displays the days of the week and month
-
Highlights days with released projections, showing:
-
A Projection counter per day
-
A summary view, including:
-
Document number
-
Expected value
-
-
-
Display the projections of a day
Click on a day on the calendar. The system displays:
-
Total projections for the selected day
-
Details of existing projections
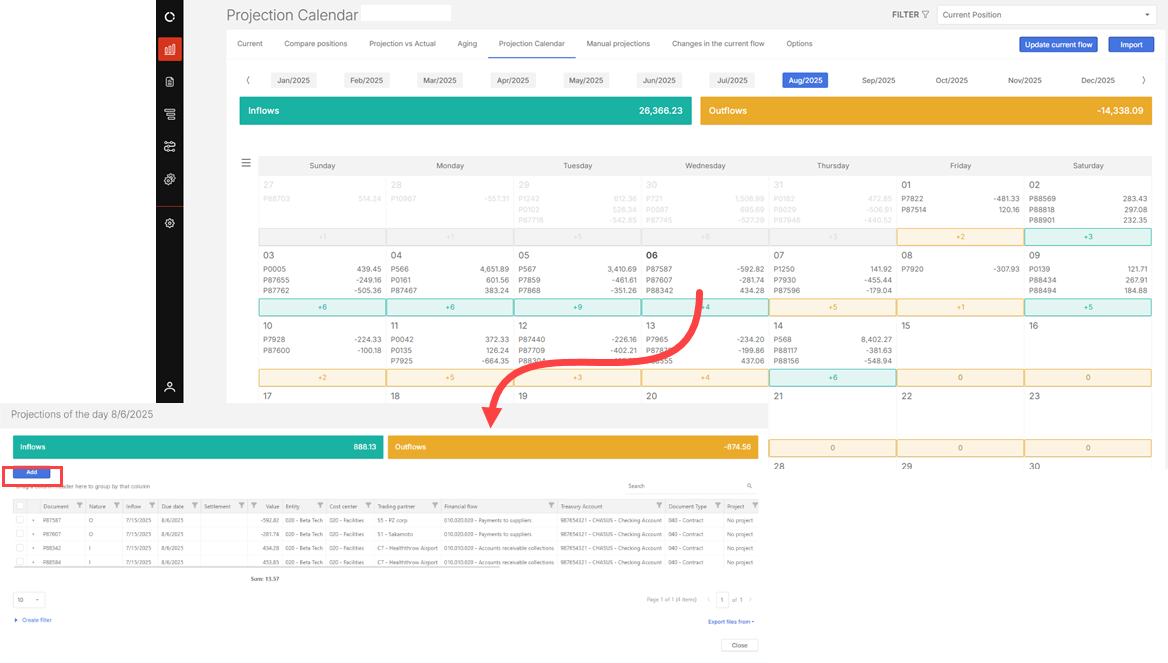
Add a new projection
-
On the Projection calendar page, click on the day to which you want to add the projection.
-
On the Projections of the day window, click
 .
. -
Provide the information required in the following fields:
-
Document key
-
Document Type (select from the list)
-
Nature (inflow or outflow)
-
Document value
-
Inflow entry date (posting date)
-
Due date (expected settlement date)
-
Description (free text)
-
Links:
-
Treasury account
-
Entity
-
Cost center
-
Trading partner
-
-
Financial flow (classification): (must be at the analytical level)
-
-
Click
 .
. Note: The projection will only appear in the cash flow after the Project projections option is executed.
Import projections (batch)
Batch projections can be uploaded using the Import option, following a standard template.
-
Click
 to display the Projection calendar import page.
 -
Download the Imports Document template available on the page
-
Fill in the template with the required data.
-
Go back to the Imports page.
-
Select the period to be imported.
-
Choose the import rule to apply to the data for the selected period:
-
Update existing
-
Add to existing
-
Overwrite all data
For details on import rules, see the Import rules section of the Importing and monitoring article.
-
-
Upload or drag the populated file to import it.
-
Click
 to run the Project Projections function. Data will be displayed in the cash flow.
Include projections in cash flow analysis
To ensure that projections are included in the cash flow analysis:
-
Navigate to Cash Flow > Current .
-
Click Filter > System Settings .
-
Enable: Include all projections in the Cash flow calculations.